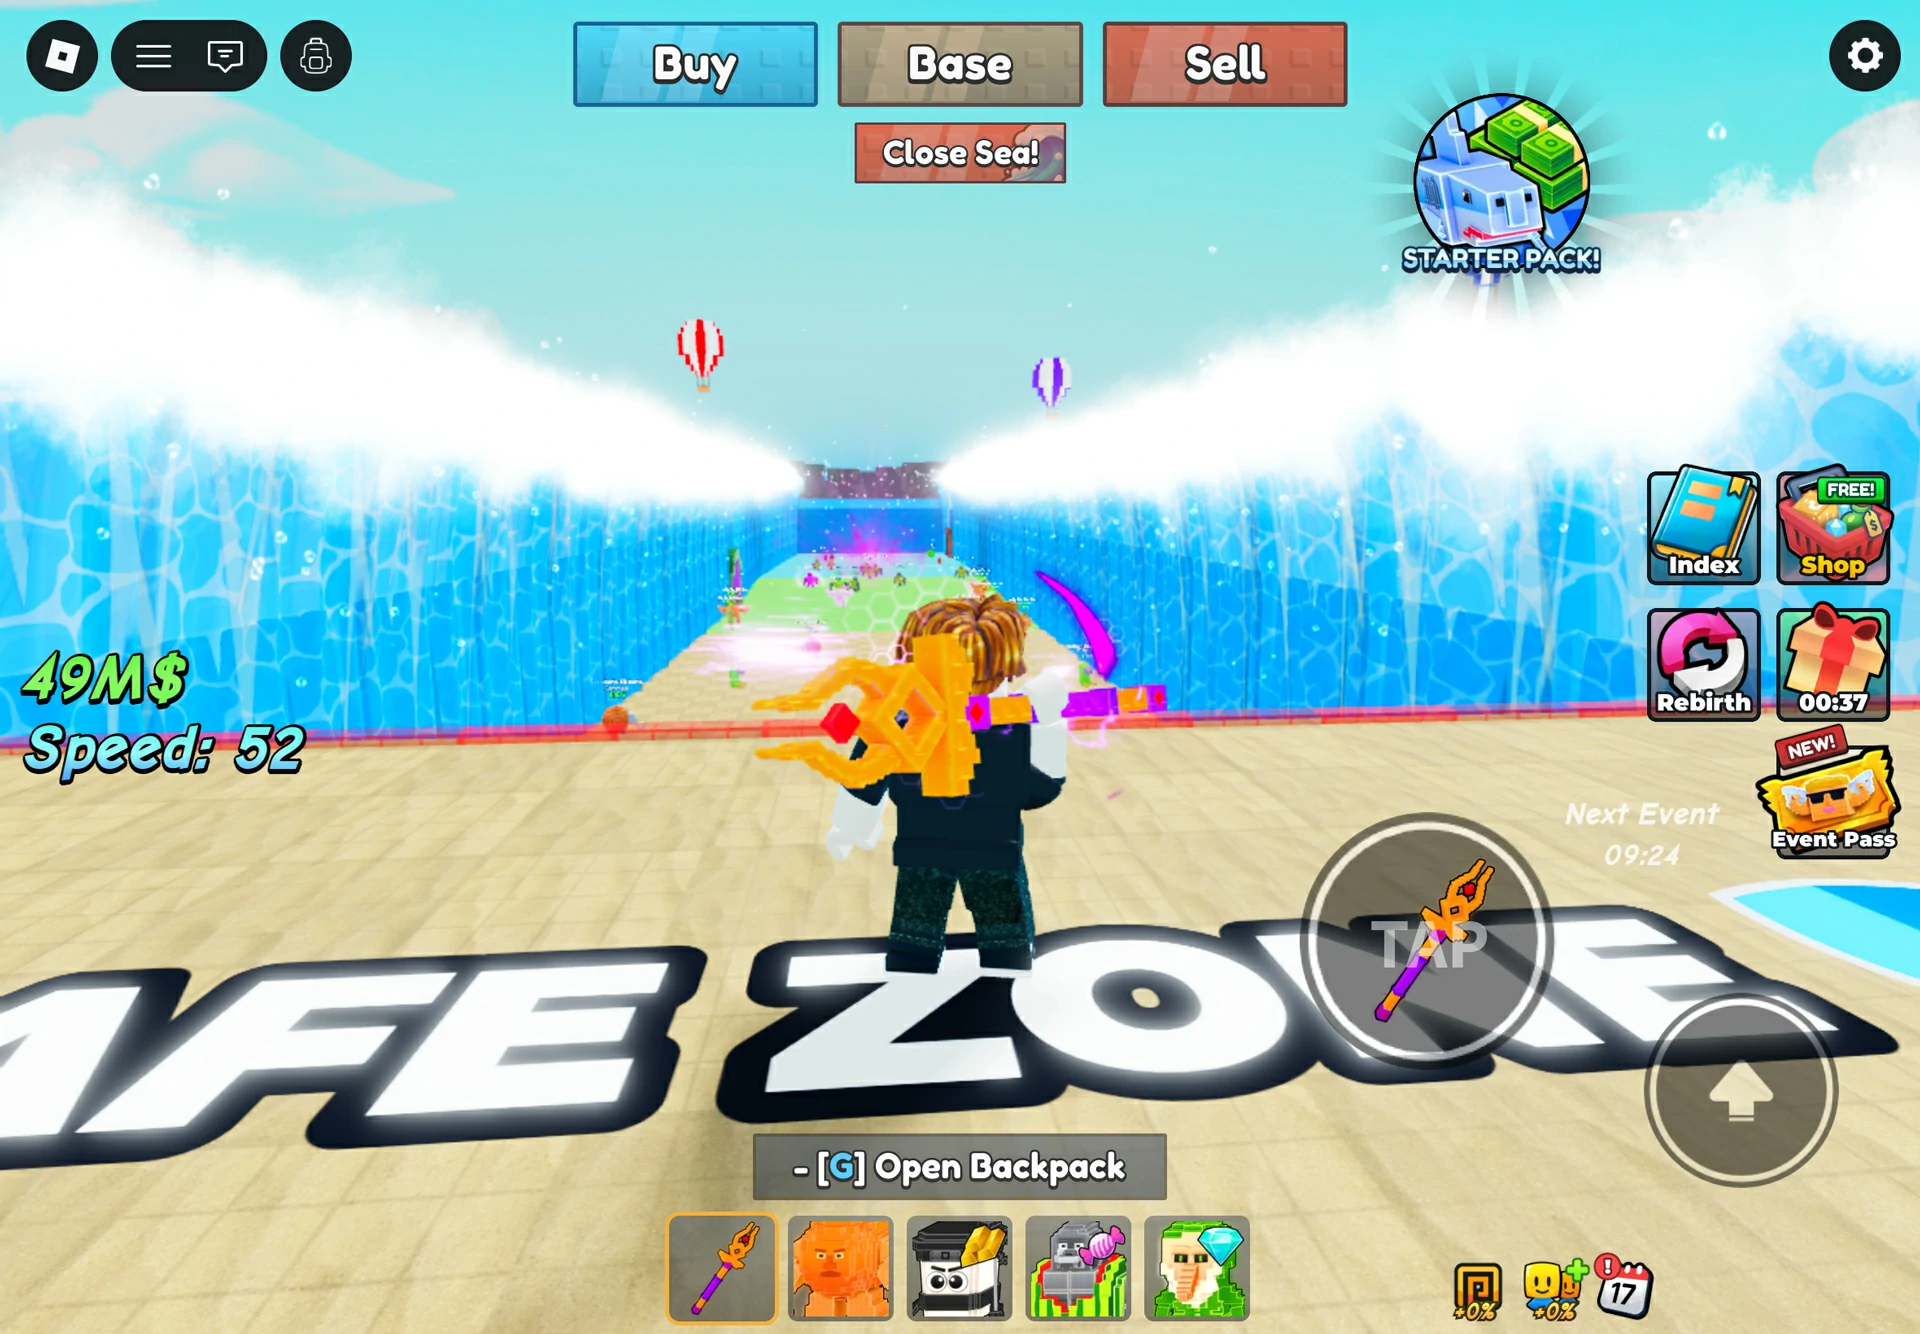
What Is Open Sea For Brainrots in Roblox?
Open Sea For Brainrots is a fast-loop Roblox progression game built around a simple but addictive structure: go out from the safe shore, split the sea, grab Brainrots before the timer closes, return safely, bank your gains, and reinvest into permanent growth. The reason the game feels sticky is that it combines short risk-reward runs with long-term account progression. Every successful run feeds the next run, and every upgrade changes how far you can travel, how much you can carry, and how safely you can escape.
The core appeal is not difficult combat in the traditional sense. Instead, the game creates tension through distance, timing, movement, and efficiency. Early on, you are weak, slow, and limited to a tiny carrying capacity. That makes every decision matter. Do you pick up one more Brainrot and risk the timer, or turn around and secure the run? Do you spend your first cash on movement, carrying power, or passive income? That exact feeling is why so many players start looking for answers once they reach the first real progression wall.
How the Main Gameplay Loop Works
At the start, you spawn near a safe area with low movement speed, no meaningful bonuses, and a tiny carrying limit. Your first job is not to chase rare loot. Your first job is to build stability. The best early-game mindset is to treat the shallow water as a money engine. Collect common Brainrots, bring them back, and start building a passive cash base. Once that loop starts generating income, the game opens up very quickly.
1. Go Out
Travel from the safe zone into shallow, mid, or deep sea areas depending on your speed and confidence.
2. Collect
Pick up Brainrots of different rarities. Higher rarity usually means better value, but also more risk and longer return distance.
3. Return
Get back to safety before the sea closes. If you overstay, you can lose the items from that trip.
4. Bank Value
Store Brainrots in base for passive income, or sell duplicates and weaker finds for immediate cash.
5. Upgrade
Spend money on speed, carry capacity, slot expansion, and account-wide efficiency.
6. Scale Up
Use rebirth and better tools to reach deep zones, lucky systems, hidden areas, and endgame rewards.
That means your progress comes from three layers at once. First, there is run efficiency: how much you can secure in one trip. Second, there is base economy: how much passive value your stored Brainrots generate. Third, there is account scaling: upgrades, lucky systems, and rebirth multipliers that permanently improve your future runs.
Best Upgrade Order for Beginners
If you only remember one section from this guide, remember this one. Most new players lose time because they upgrade in the wrong order. The most reliable early path is to prioritize long-term base value and movement before trying to greed for high-end loot. Slot value, speed, carry growth, and later rebirth timing form the backbone of efficient progression.
| Priority | Upgrade | Why It Matters | When to Buy |
|---|---|---|---|
| 1 | Placement / Base Slots | Improves passive income and long-term scaling | Immediately and consistently |
| 2 | Movement Speed | Reduces travel risk and improves deep-zone survival | As soon as slot growth feels stable |
| 3 | Carry Capacity | Raises value per trip and reduces wasted return runs | After speed becomes comfortable |
| 4 | Income / Global Yield | Makes every stored Brainrot worth more over time | Mid game onward |
| 5 | Luck | Improves value from lucky systems and higher-tier rewards | After your farming route is already stable |
Best Progression Loop: From Beginner to Endgame
If you want the smoothest path from early farming to late-game efficiency, follow this route instead of rushing deep zones too early. The goal is to build stable income first, then improve speed and carry power, and only push into higher-risk areas when your account can handle them consistently.
Beginner
Farm the shallow sea for common Brainrots, then invest into movement speed first and carry capacity second.
Growth
Move into the mid sea and start farming uncommon or rare Brainrots. Shift spending toward efficiency and base income, then prepare for your first rebirth.
Advanced
Start farming the far sea for epic Brainrots, stack multiple rebirths, and unlock hidden sea areas once your route becomes stable.
Endgame
Use high-end tools like the Golden Shovel and Lucky Badge to dominate hidden routes and push your income to the cap.
Weapon Types and Stick Progression
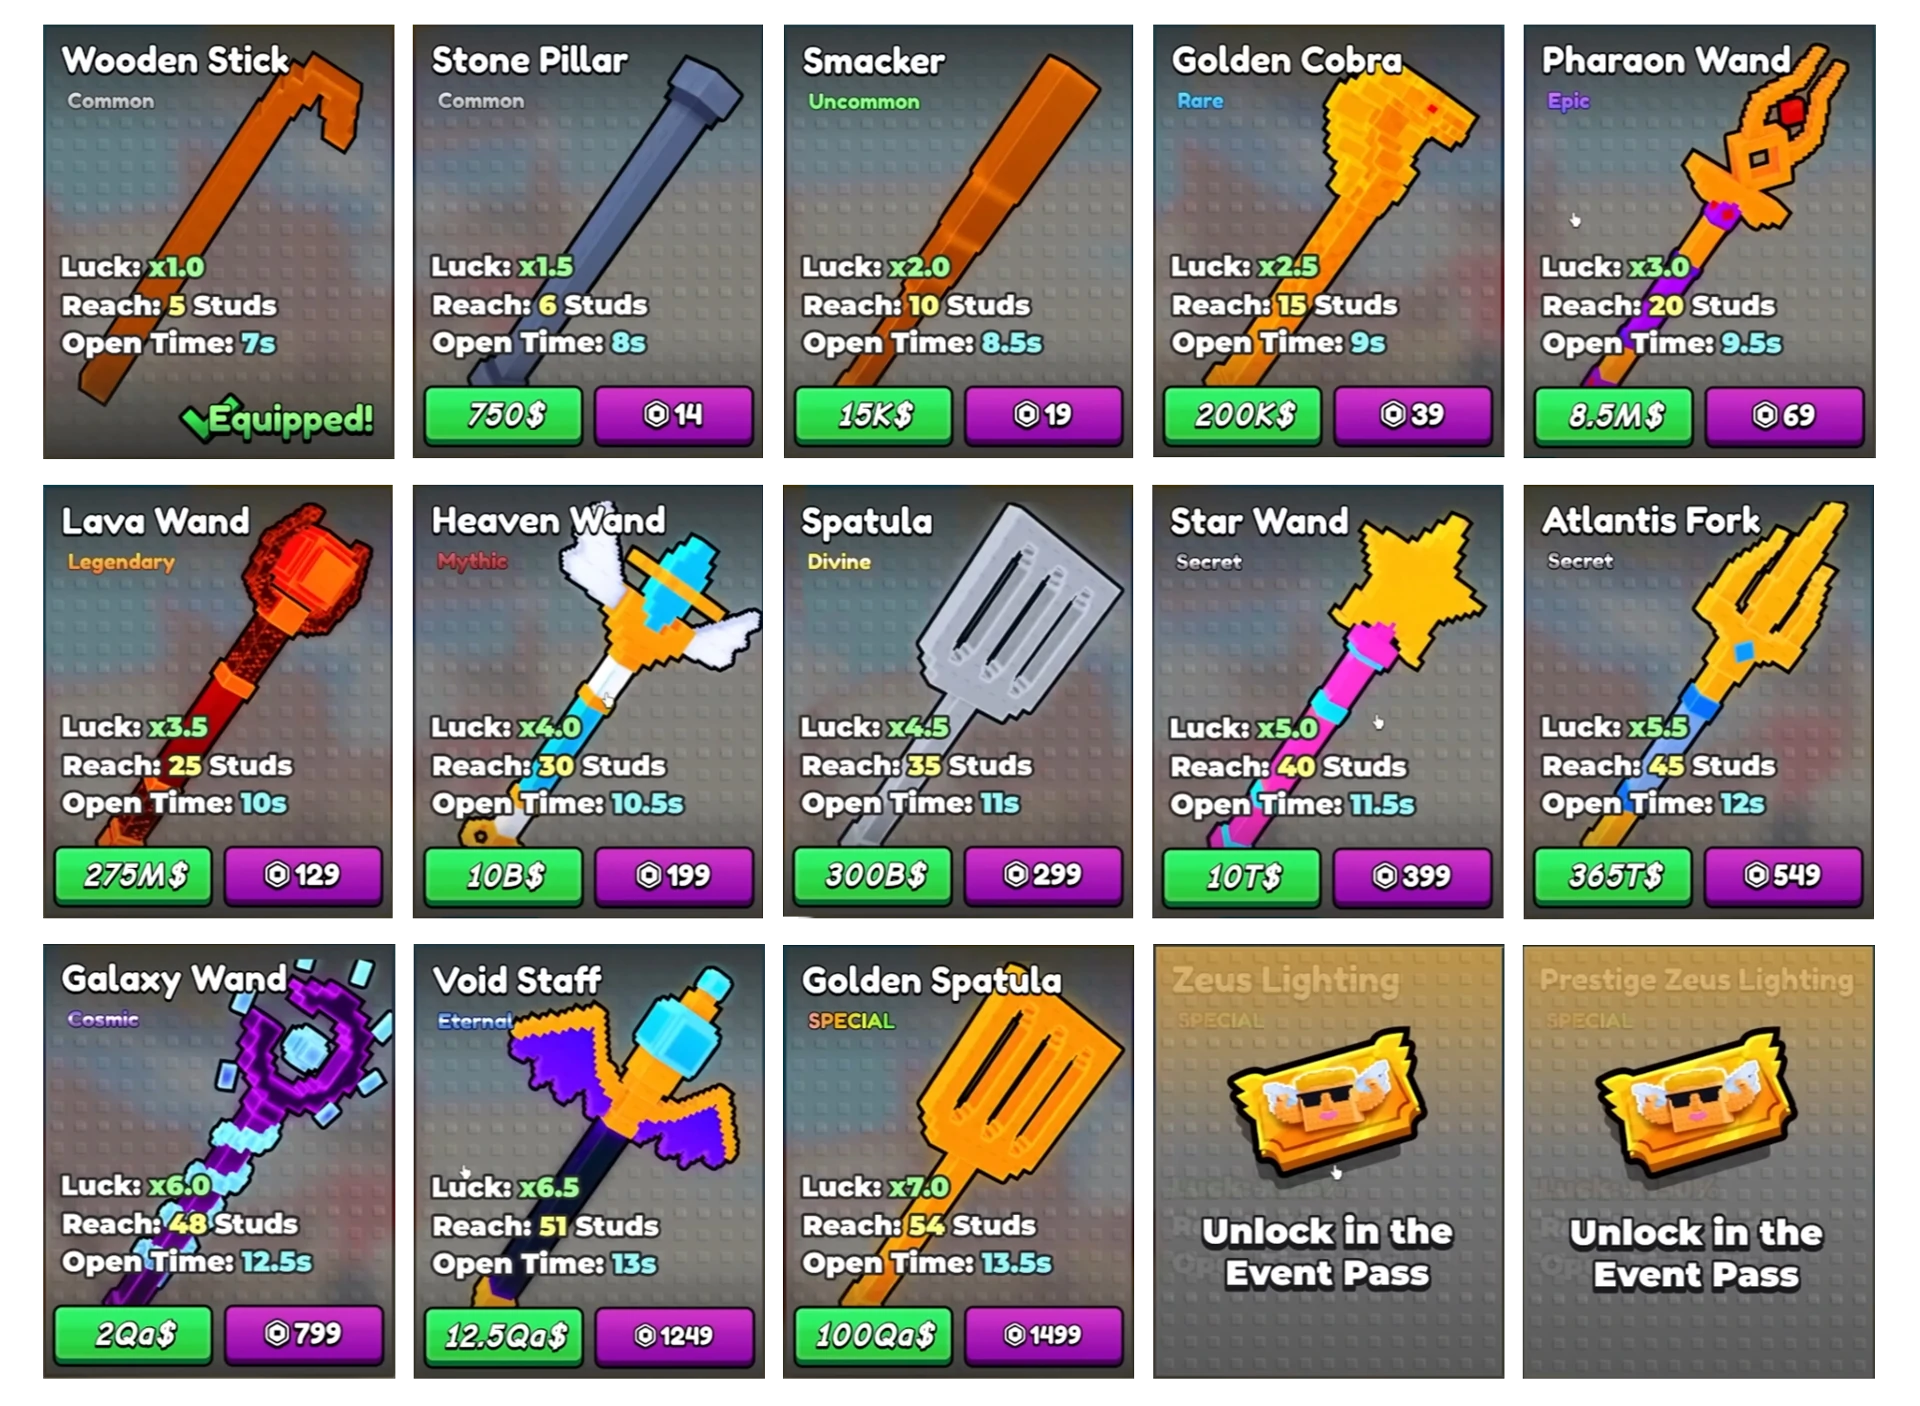
Your screenshots show that weapon progression matters because each stick or wand changes three practical values: luck, reach, and open time. That means weapon choice is not cosmetic. It directly changes how far you can interact, how long the sea stays open, and how strongly your runs scale into better rewards.
From the screenshots, the progression clearly moves from entry-level tools like the Wooden Stick and Stone Pillar into stronger options such as Smacker, Golden Cobra, Pharaoh Wand, Lava Wand, Heaven Wand, Spatula, Star Wand, Atlantis Fork, Galaxy Wand, Void Staff, Golden Spatula, and Zeus Lightning variants.
| Weapon Stat | What It Does | Why It Is Important |
|---|---|---|
| Luck | Raises the chance of stronger or more valuable outcomes | Better for advanced farming, lucky systems, and long-term scaling |
| Reach | Extends interaction distance | Lets you collect from safer positions and improves route efficiency |
| Open Time | Keeps the sea open longer | Increases survival margin, especially in deep or dangerous areas |
Monster Types, Bonus Labels, and How to Identify Them
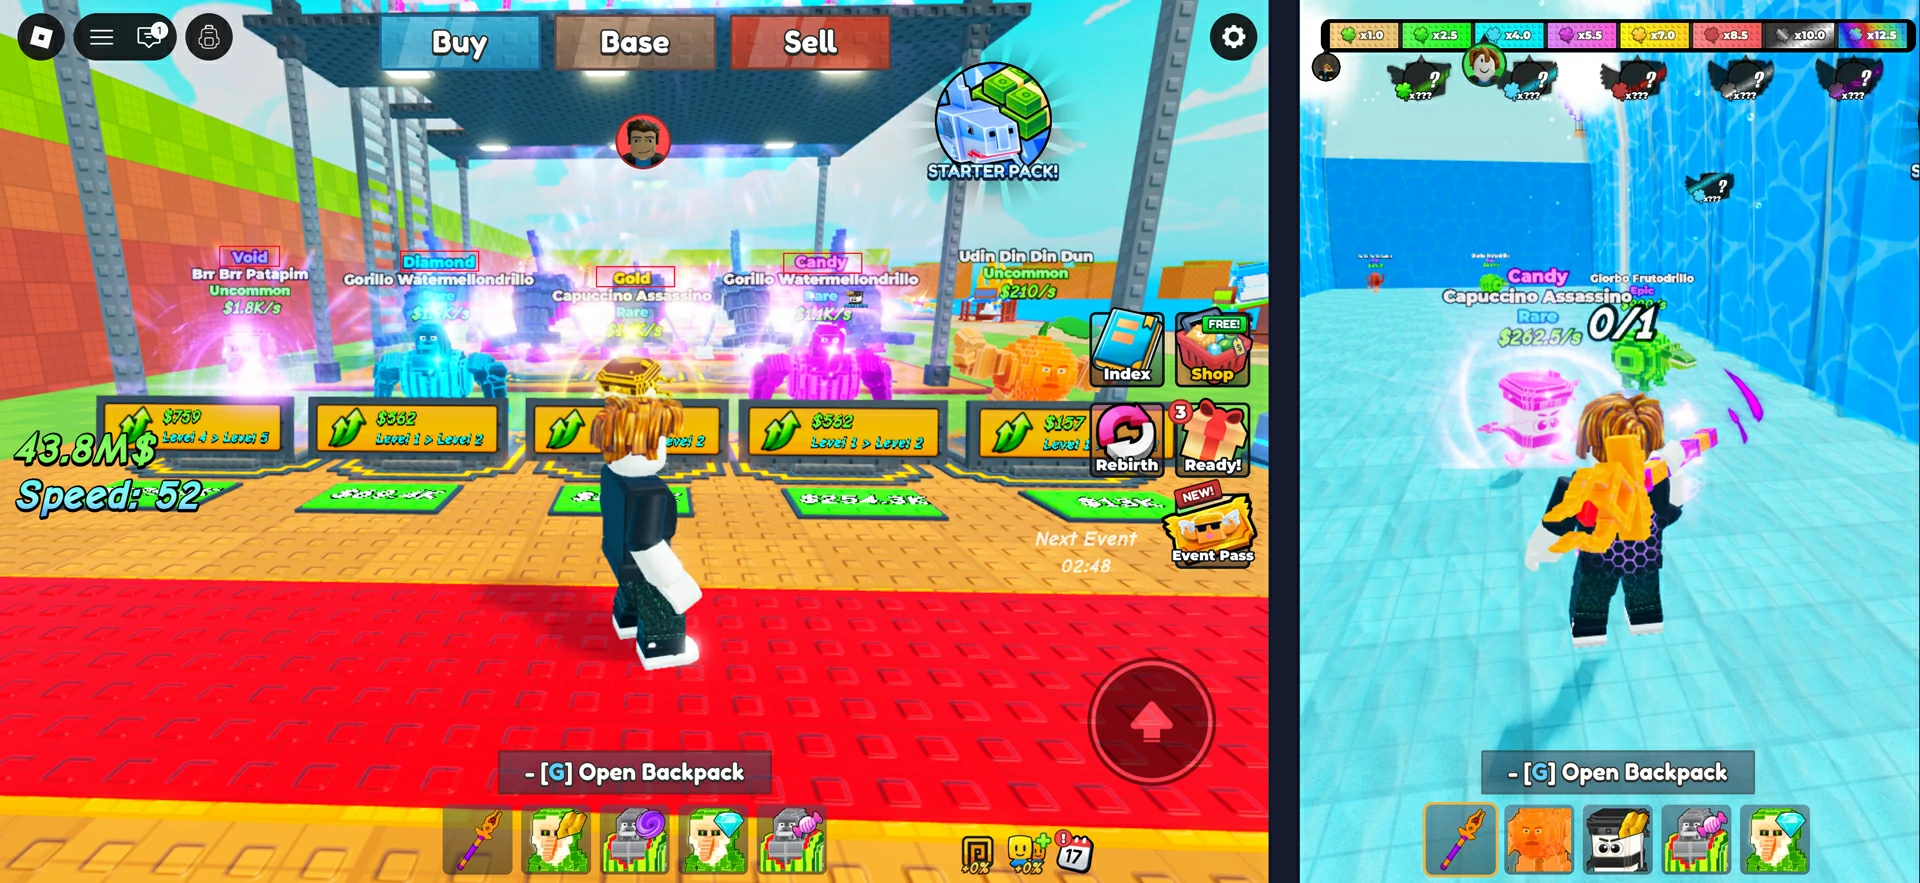
In Open Sea For Brainrots, these monsters are not just targets you run past. They can be captured and turned into income sources, so learning how to identify them quickly is important for efficient progression. The key detail is the bonus label shown above the monster, because that label tells you how much extra value it can generate.
If a monster has no bonus text above its head, it has Normal. If it does have a label, the bonus tiers are easy to rank: Void is the highest, followed by Diamond, then Gold, and finally Candy.
Bonus Label Priority
- Void: +200% bonus
- Diamond: +150% bonus
- Gold: +100% bonus
- Candy: +50% bonus
- Normal: no bonus
How to Use This in Practice
When you are deciding what to capture, check the label first instead of judging only by appearance. In most cases, a monster with a higher bonus label is the better choice for scaling income faster. This makes quick label recognition one of the easiest ways to improve your farming efficiency.
Lucky Blocks, Hidden Rewards, and Why Luck Matters
Lucky blocks add a second layer of progression on top of your normal runs. Once players understand the basic loop, they usually start asking more advanced questions: when should I open better blocks, should I build luck first, and what order gives the best value if I do not want to waste resources?
| Lucky Block Type | Typical Value | Best Use Timing |
|---|---|---|
| Normal | Early-game Brainrots, temporary boosts, small cash | Use freely in early progression |
| Advanced | Better rarity access and small permanent gains | Open when your route is stable |
| Mythical | High-tier rewards and meaningful account boosts | Best in mid to late game with improved luck |
| Secret | Top-end reward potential and rare bonuses | Save for high-luck account states |
Sea Areas, Hidden Zones, and Progression Path
The farther you go, the more every stat matters. Deep travel is not only about bravery. It is about whether your speed, carry limit, and return discipline are good enough to make the trip worth it. That is why the best route is not always the deepest one available. It is the deepest one you can run consistently without turning your gains into losses.
- Shallow Sea: best for opening economy, learning timing, and funding first upgrades.
- Mid Sea: the first real efficiency test, where speed starts to matter more than greed.
- Deep Sea: stronger value, better drops, and increased punishment if your route is poor.
- Abyss: high-risk farming and likely the point where optimized gear becomes mandatory.
- Endgame / Boss Area: for players who already understand the full loop and want top-end rewards.

Rebirth Strategy: When to Reset and Why It Matters
Rebirth does not reset your entire progress. It only resets your speed upgrades in exchange for a permanent money multiplier, making it one of the game’s core long-term progression systems.
Rules: Each time you rebirth, the required speed level increases by 10, and your money multiplier increases by +0.5x. There is no cap, so the more times you rebirth, the stronger your late-game income becomes.
How Rebirth Works in Practice:
Upgrade speed until you reach the current rebirth requirement
→ make sure you have enough cash
→ trigger rebirth
→ gain the permanent multiplier bonus
→ level speed again
→ repeat the cycle.
Recommendation: Do not rebirth too early. Upgrade your carry capacity and efficiency first so that each run stays profitable. This helps you avoid becoming too weak and inefficient right after rebirthing.
Open Sea For Brainrots FAQ
What should I upgrade first in Open Sea For Brainrots?
Start with slot or base value growth, then movement speed, then carry capacity. That order gives you a stronger passive foundation and safer trips.
Are better sticks and wands worth buying early?
Yes, but only when the extra luck, reach, or open time solves a real farming problem. A stronger weapon is most valuable when it lets you safely farm a better area or collect more reliably.
How do I farm faster without spending Robux?
Use the safest efficient route, do not overstay in risky areas, prioritize speed and carry upgrades, and use hidden or high-value zones only after your account is ready.
When should I use better lucky blocks?
Use stronger lucky blocks after your account has decent luck and a stable farming route. Opening premium blocks too early can reduce their long-term value.
Is this game more about combat or farming?
It is mostly a timing and farming optimization game with danger management, route discipline, and progression decisions at its core.